Showing posts with label DIY. Show all posts

Tuesday, 10 January 2017

DIY TeePee Storage

I'm getting ready to move into a house about half the size of my current place, so I have been scrolling through Pinterest like a mad woman!

I found a few different ways to store that excess toilet paper you get once you purchase it, but none that fit my criteria - simple, easy, using materials I already have, and more importantly - FREE!

I came across one that Stella made, and it's perfect!! She used materials she already had, and it's colorful!

So I gathered up my skewers, some tissue paper, and some yarn instead of ribbon (which I decided to braid).

First, I measured the stick against the toilet paper roll, and cut the pointy part off, since I can just picture the horror of sharp stick in the hands of a 4 year old!


Then, I measured the length of yarn I would need, and added a bit more since I would be braiding it and making a loop. Repeat twice for the 2 other braid strands. Then, I tied them all to the skewers and braided them. Once I got to the end, I made a loop and tied a few knots to ensure it would stay together with the weight of the TP.


Ta da!

{Daily Random Fact: Until coffee gained popularity, beer was the breakfast beverage of choice in most urban areas in the United States}

Saturday, 15 October 2016

DIY Door Stop

I never thought I would be needing one of these home decor items, but there I was - browsing images, instead of doing paperwork. 


This, like most of my searches, started out with "DIY" because if I can't make it for myself, it really makes me question the necessity of the item in question.

My door automatically closes, so I use my garbage can to keep it propped open. It occurred to me today, as I was vacuuming and moving my garbage can around, how much easier (and potentially cleaner) it would be to just have something that's actually made to hold a door open, keep the door open for me! Insert Google.

I found a few cute door stops, but nothing that was truly my style. I found a cute dinosaur stop that could have totally worked, and inspired me to raid the playroom, in search of an unused toy!

Luckily for me, we have a dozen Mr. Potato Heads and parts!

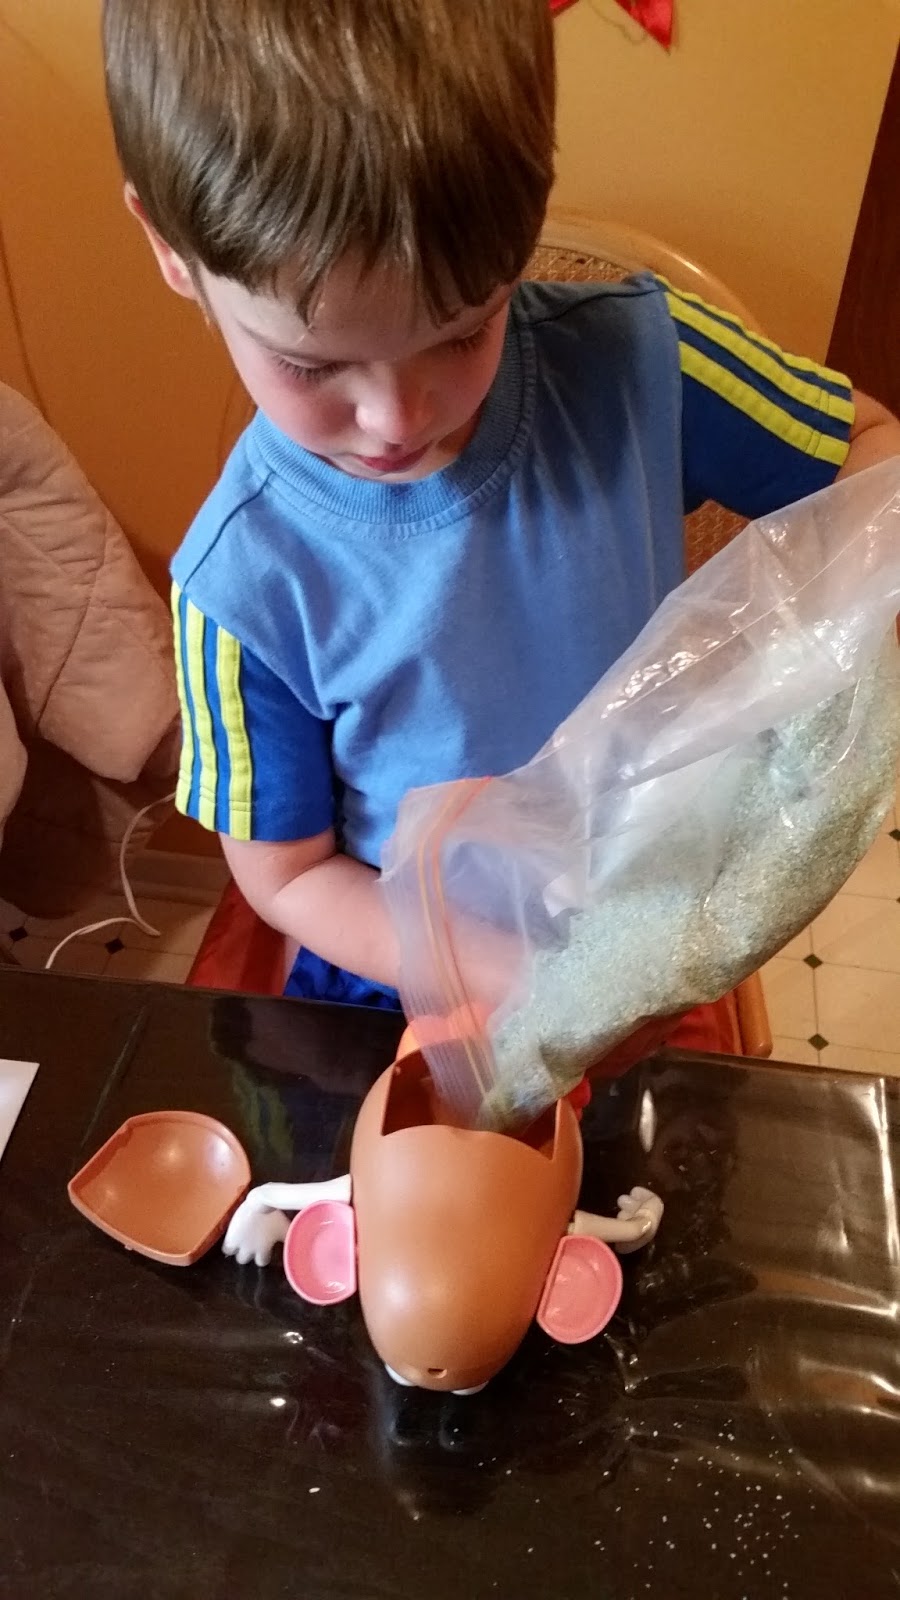
So I gathered my supplies - Mr. Potato head with all his parts (minus a hat), a hot glue gun, and some sand to make the door stop stay in place.


I started off by ensuring that the entire bottom of the potato was covered by the feet. Then I added a very generous layer of hot glue on top of the opening, to ensure that the sand will not seep out of the potato.


Next, I got my little helper to fill in the potato with sand.


Once the potato was about 3/4 full, we close the back (or lid.. I'm not sure what the appropriate term for Mr. Potato's butt cover is!), and then hot glued it shut, to prevent any sandy spillage.


Using the hot glue, of course, led to wanting to branch out to doing more hot glue crafts. 
Squirrel!


Ta-da!
Now you've got yourself a man you can depend on, and rely on to hold the door open for you.

There are so many jokes I could make right now, but I am just going to revel in the fact that I have upcycled something in my home to turn it into something useful and fun to look at!


Much love for the potato man!


And if you're interested in learning more about potatoes, or the potato famine, Mary Kate can teach you all about it! 
(NSFW)

{Daily Random Fact: Potatoes have more potassium than a banana, more vitamin C than an orange, and more fiber than an apple.}

Thursday, 3 September 2015

Dirty 30

I'm not 30.. yet. 


Most of my friends, however, are the big 3-0. 
Thank goodness it's not me, amiright?! 

I have gone back and forth on whether or not 30 is a big deal.
It's just a number, I won't feel any different, and I have already reached a lot of adult milestones.
So today, I'm being ok with no longer being 20-something. I am now - almost - a 30 year old. 

Moving on..

Two years ago, some important people in my life turned 30. I went all DIY on their butts and made a fun trivia game. As we waited at the restaurant for dinner, we played this riddle filled game I prepared for our friends. The answers were things that turned 30 years old that year -
like the Dodge Caravan. (I never got around to posting about it, but I swear it happened!) 

So this year, I decided to be even more crafty for this person's gifts AND write a post about it!
BAM!

I made him a few things, and since we don't live in the same city, I wanted it to be special. I had the great idea of mailing him a package every week.
At the end of this post, you will read about why that was better in theory, than in practice.

First gift: I sent him a book. Nothing overly special about that, but I put a few post-it notes on some funny pages, which means that I actually had to read a lot of the pages and I'm not much of a reader.
Reaction: He was impressed that I had actually opened the book and had done that. Go me!

Second gift: I sent him a plate warmer, that I made, using a tile that I found at the local thrift store. I wrote out a bunch of lyrics, from different songs that we like, which is actually far more challenging when a certain person doesn't appreciate country music the way I do!

(This was my outline, that was improved with the creative input of my 3 year old.) 

Reaction: He thought it was sweet (that's what I took from the "aww") and mentioned that he actually needed a plate warmer.
Call me butter 'cause I'm on a roll!

Third gift: I sent him a book safe I made, using a book I found at the same thrift store.


I cut out an inside section (which was more difficult than I anticipated) and then glued the pages together. I didn't glue the hollowed out part to the bottom.. but I'm not really sure why.
Design choice? Let's go with that.


I added some chocolate because, well, it's delicious. 


Reaction: A smile, a chuckle, and a "yum".
Another win!


I saved the best for last.

I made (in collaboration with a friend) a Lego candy dispenser.


 When you pull on the candy piece, some yummy candy comes out the bottom!


We looked at a few tutorials, and went with the materials I had on hand. As it turns out, I had a lot of egyptian themed Lego, so that's ultimately where it ended up, even though it was not part of the original design. 


To send it, I bubble wrapped it as much as I possibly could - and then some - to avoid taking it apart and writing instructions on how to put it back together.
As it turned out, instructions were needed.
It arrived in a few pieces, so I walked him through the remodeling over live chat.
Reaction: He called it "interactive" and "sweet" (heehee, I'm a sucker for puns!).

He enjoyed all the gifts, but the original intention was lost on him.
I wanted to send him a gift a week, so he would have a present a week to open, as this is a big deal of a birthday. But of course, there were bumps.
The first issue is that I sent the first gift, during the first week of August, so it didn't arrive until the following week. Therefore, I had to send the second one the next day, in order to keep "on schedule".
The second issue was getting him to open the gifts as they arrived.
He claimed that because it was not his birthday, he shouldn't open the gifts right away. I spent 3 days trying to convince him - without giving it away - that he should open the gift anyway.
When the second gift arrived, I had more of a reason to get him to open the first gift - which he ended up doing.
Of course, the third one arrived and he still refused to open anymore of them, and believe me, I bugged him about it for many days!
On the day of his birthday, he opened the first three via video chat.
The last bump in the road was that he hadn't checked his mail on the day of his birthday when the Lego candy dispenser was delivered. Go team!

So next year, a new plan will have to be put into effect, and it will involved much less bubble wrap!
But I call it a win because there were presents and Lego.

Happy 30th birthday!

{Daily Random Fact: All Lego made in the last 54 years fit with each other. Despite alterations in design and purpose, all varieties of Lego are part of one universal system and the individual pieces remain compatible with the existing pieces.}

Sunday, 17 November 2013

Menu Board

I am absolutely awful at meal planning and grocery shopping. 

Seriously. I'm pretty sure that my toddler would do a better job at putting together dinners than I would!
I want to change! That's the first step, right?! 

So when I saw Sarah's menu board, I knew I had to make it! 
It fits my crafting criteria - quick to make, simple, and upcycled!  


All of the materials I used were going to be thrown out.
I used old file folders for the food cards and little boxes for the extras. 
Sarah wrote the ingredients on the back of all the cards, but I managed to only get a few written out since most ingredients are based on whatever is on sale so the meal is more of a guide than a recipe. 


Once everything was glued to the board with hot glue, I nailed in the little piece that holds it on the wall.
(As a photography graduate, I am embarrassed to say that I don't know what that piece is called!)
And in hindsight, I really should have nailed the hanger thing onto the board before bulking up the front of the frame - oops!


Grammatical shortcomings aside, I think it looks pretty cute in my hallway beside my favorite frame. 

When I have used it, it's really useful and takes away a lot of my dinner stress! I have been super busy lately with dog related business, so I have neglected the planner in me. 

All in all, this project cost me $0 so I consider that a craft win!

{Daily Random Fact: The tallest species of trees in the world include the Coast Redwood, Giant Sequoia, Coast Douglas Fir, Sitka Spruce and Australian Mountain Ash.}

Friday, 5 April 2013

Duvet Cover to Skirt : Abby edition

I started off with the intention of making a ruffle skirt for Abby, but changed my mind after seeing a ton of tutorials for a pillowcase dress.

A skirt would have had to be a lot more precise and that's just not my style, so I took the easy way out and made this pillowcase dress (which was inspired by Anneliese at Aesthetic Nest)..


It was super easy to make!

I roughly measured a chunk of the duvet cover to Abby's body, under the arms, and ripped it down until I had the approximate length.

Next, I folded it in half and ironed the entire piece to get it flat and create a seam on the side that was just folded. Once that was done, I cut a slit on the one side that wasn't open, to create an armhole. I ironed the pieces in a small triangle shape, instead of a 'u' shaped armpit.

Easy way out - I warned you!

Then, I sewed the one side shut, up to the armpit hole. I used a zigzag stitch to sew the armpit part because I knew the stitch would be seen and I thought that I would make it a little more fun!
Once I had sewn the armpits, I ripped 6 pieces of fabric, about 1/2 inch wide, and made 2 braids, then threaded them through the top pieces, and sewed them together.  
Looking back, I could have done 1 long braid and sewn the ends together - silly me!

I recommend this dress to anybody! 
If you have a large piece of material that you would like me to turn into a pillowcase dress or shirt - bring it!

Daily Random Fact: Himalayas means "abode of snow".

Duvet Cover to Skirt : Mel edition

Spring is here, so skirts are on the menu!

I have given myself a crafting challenge! I will not buy anything for crafting purposes until my birthday - that's 5 1/2 months - I think I can do it! It's going to be a good clean up/motivation to finish projects! And I'm ridiculously motivated to sew!

It may have to do with the fact that my sewing machine is fixed, or the fact that I want to re-purpose everything in sight, or the fact that spring screams skirt weather - I think it's a bit of everything! 

Side-note.. I even set up a temporary sewing station! 


Seriously, how great are skirts?! I know not every girl likes wearing them, but who can argue with the comfortable ones?!

Well, recently, Mel was donating her IKEA duvet cover (that I'm pretty sure half of the population owns, including myself) and I snagged it before she had the opportunity to give it up - phew! We decided that I should make a matching skirt for her, Abby, and I (and maybe a doll) for our annual family pictures.

So, I started with Mel's skirt because I had quite a vision - different colored panels and triangles to create a fun, flowy skirt. 

I ripped the panels, since the sheet is cotton, to get the straightest edges possible. Then, with Mel's help, I folded some of the large rectangles and cut them down the middle in an angle, to get 2 triangles. 
Next, I dusted off my iron and put it to good use! I ironed every rectangle and triangle. 
Once everything was flattened, I pinned the front pieces together, and the back pieces together. 
For the back piece, I used an equilateral triangle because it was my best guess as to how to join the triangle pieces.

Once everything was pinned, I began sewing everything together - the best part! 
After that, it better resembled the finish product, so I ironed a seam allowance, and sewed it. I ended up using all beige thread because i don't have any other color thread besides blue and I think the beige is better in this case! 

The final part was sewing the waist band on. 
Mel had an old shirt that I used as the waist band. I cut the bottom half of the t-shirt, pinned it while stretching it out to the top of the skirt, and sewed it on using elastic thread. 

All in all, this skirt was pretty easy to make! And lots of fun! 
And of course, super cute!
See?!

Bring me some material for an adorable spring skirt!

{Daily Random Fact: Las Vegas means "The Meadows" in Spanish.}